0%

Github Hexo Blog PicGo Conf

跨平台win/mac更新博文 / 设置Github图床

After My download from OneDrive.

  1. Node.js

  2. Git

  3. Hexo

    1. Under the installation directory
    2. Git Bash
    3. Npm install hexo -cli -g
    4. SSH Key to Github
    5. OK
1
2
3
4
5
6
7
8
9
10
11
12
13
14
SSH Key to Github

git config --global user.name "FlyMeToTheMars"
git config --global user.email flyhobo@live.com

ssh-keygen -t rsa -C flyhobo@live.com

(file in C:\Users\Administrator\.ssh)

Then upload to github.com with website

Test:

ssh git@github.com

更新于2020/4/11

macOS亲测 相同方法可用,自此Hexo在全平台OneDrive上同步,全平台可以实时更新日志


第三次更新与2020/4/22

配置多个git源的办法

1
2
3
ssh-keygen -t rsa -f ~/.ssh/id_rsa_gitlab -C flyhobo@live.com

ssh-keygen -t rsa -f ~/.ssh/id_rsa_github -C flyhobo@live.com

给不同的公钥配置起不同的标志性id

在网站上配置完成之后

在 ~/.ssh目录下新建config文件

1
2
3
4
5
6
7
8
9
10
Host github.com
HostName ssh.github.com
User flyhobo@live.com
PreferredAuthentications publickey
IdentityFile ~/.ssh/id_rsa_github

Host git.lug.ustc.edu.cn
HostName git.lug.ustc.edu.cn
User flyhobo@live.com
IdentityFile ~/.ssh/id_rsa_gitlab

缩进注意

内容如上就ok了


PicGo : https://github.com/Molunerfinn/PicGo/releases

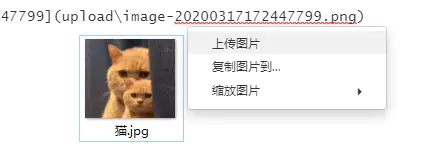
PicGo + 新版本 Typora ,PicGo维持原先设置不要变,然后Typora在设置里面傻瓜设置即可达成目的。

image-20200317172757117

Tips

上床图片出现:{“success”,false}

说明图片名字重复了,在PicGo里面打开时间戳命名图片。


Hexo 添加 GitHub Gist

脚本:

1
<script src="https://gist.github.com/FlyMeToTheMars/fceac49c5990645393be7bd1e62d7a72.js"></script>

这个链接是把网址后面的标签部分去除了,然后加上了 .js 这样一个链接。

效果:
import org.ansj.recognition.impl.StopRecognition
import org.ansj.splitWord.analysis.ToAnalysis
import org.apache.spark.ml.feature.{HashingTF, IDF, Tokenizer}
import org.apache.spark.ml.linalg.{BLAS, Vector, Vectors}
import org.apache.spark.sql.expressions.UserDefinedFunction
import org.apache.spark.sql.functions._
import org.apache.spark.sql.{DataFrame, SaveMode, SparkSession}
import scala.collection.mutable.ListBuffer
/**
* author Renault
* date 2020/3/31 15:04
* Description Created By Friend Renault
*/
object ContractHit {
//Spark机器学习分词解析合同数据
def main(args: Array[String]): Unit = {
val spark = SparkSession.builder().appName("datatopg").master("local[1]")
.enableHiveSupport()
.getOrCreate()
val df = spark.read
.option("header", "true") //在csv第一行有属性"true",没有就是"false"
.option("inferSchema", true) //这是自动推断属性列的数据类型
.option("delimiter", ",")
.csv("src/main/data/contract/合同项目列表.csv")
.toDF("contract_name","contract_id","area","province")
.filter(col("contract_name").notEqual("NULL"))
.select("contract_name","contract_id")
// val dim = math.pow(2,18).toInt
import spark.implicits._
val parse = spark.sqlContext.udf.register("getDistance",parsetext _)
/**
* 中文分词
*/
val tokens = df.withColumn("tokens",parse(col("contract_name")))
.select(col("contract_name"),col("tokens"))
/**
* 将分词转为数组
*/
var tokenizer = new Tokenizer().setInputCol("tokens").setOutputCol("tokens_array")
var takensData = tokenizer.transform(tokens)
var hashingTF =
new HashingTF().setInputCol("tokens_array").setOutputCol("rawFeatures").setNumFeatures(math.pow(2,18).toInt)
//这里将中文词语转换成INT型的Hashing算法,
// 类似于Bloomfilter,上面的setNumFeatures(100)表示将Hash分桶的数量设置为100个,
// 这个值默认为2的20次方,即1048576,
// 可以根据你的词语数量来调整,一般来说,这个值越大,
// 不同的词被计算为一个Hash值的概率就越小,
// 数据也更准确,但需要消耗更大的内存,和Bloomfilter是一个道理。
val hashtf= hashingTF.transform(takensData)
// hashtf.show(false)
/**
* tf-idf(term frequency-inverse document frequency)
* 一种广泛用于文本挖掘的特征向量方法,
* 用户反映术语对语料库中文档重要性,
* tf(Term Frequency):表示一个term与某个document的相关性,
* idf(Inverse Document Frequency):表示一个term表示document的主题的权重大小
*/
var idf = new IDF().setInputCol("rawFeatures").setOutputCol("features")
var idfModel = idf.fit(hashtf)
var rescaledData = idfModel.transform(hashtf)
// 读取待匹配数据
val readydata = spark.read
.option("header", "true") //在csv第一行有属性"true",没有就是"false"
.option("inferSchema", true) //这是自动推断属性列的数据类型
.option("delimiter", ",")
.csv("src/main/data/contract/投标跟踪项目列表.csv")
.select("项目名称").withColumnRenamed("项目名称","contract_name")
//对获取到的数据分词并向量化
// val readytaken= tokenWord(readydata,parse,"contract_name")
// val readyfeatures = tf_idffun(readytaken)
val readytaken= tokenWord(readydata,parse,"contract_name")
val readyfeatures = tf_idffun(readytaken)
val list_buffer =new ListBuffer[ResultDf]
readyfeatures.collect().map(x=>{
val contract_name= x.getAs[String]("contract_name")
val selected_feature:Vector = x.getAs[Vector]("rawFeatures")
println(s"合同名:$contract_name")
val sv1 = Vectors.norm(selected_feature, 2.0)
val sim = rescaledData.select("contract_name","features").map(row =>{
val id = row.getAs[String]("contract_name")
val feature:Vector= row.getAs(1)
val sv2 = Vectors.norm(feature, 2.0)
//求余弦相似度 该值越小表示匹配度越高
val similarity = 1-BLAS.dot(selected_feature.toSparse, feature.toSparse)/(sv1 * sv2)
SimilarityData(id, similarity)
}).toDF("id","similarity").as[SimilarityData]
val resultdf= sim.sort("similarity").select("id","similarity").limit(10)
.withColumn("contract_name",lit(contract_name))
resultdf.select("contract_name","id","similarity")
.collect().foreach(x=>{
val contarct_name = x.getAs[String]("contract_name")
val id = x.getAs[String]("id")
val similarity = x.getAs[Double]("similarity").formatted("%.2f").toDouble
list_buffer+=(ResultDf(contarct_name,id,similarity))
})
})
spark.createDataFrame(list_buffer)
.write.mode(SaveMode.Overwrite).csv("src/main/data/out")
// val selected = readyfeatures.sample(true, 0.2, 8).select("contract_name","rawFeatures").first()
//
// val selected_feature:Vector = selected.getAs(1)
//
// val sv1 = Vectors.norm(selected_feature, 2.0)
//
// println("随机选取合同=" + selected.getAs[String]("contract_name"))
//
// val sim = rescaledData.select("contract_name","features").map(row =>{
//
// val id = row.getAs[String]("contract_name")
//
// val feature:Vector= row.getAs(1)
//
// val sv2 = Vectors.norm(feature, 2.0)
// val similarity = 1-BLAS.dot(selected_feature.toSparse, feature.toSparse)/(sv1 * sv2)
//
// SimilarityData(id, similarity)
//
// }).toDF("id","similarity").as[SimilarityData]
//
// println("与之最相似top10合同为:")
// val sql = sim.sort("similarity").select("id","similarity").limit(10)
// .withColumn("contract_name",lit(selected.getAs[String]("contract_name")))
}
case class SimilarityData(var id:String, var similarity:Double)
case class ResultDf(contract_name:String,contract_id:String,similarity:Double)
def parsetext(cols:String): String ={
// val filter = new StopRecognition()
// filter.insertStopNatures("w") //过滤掉标点
var str = if (cols.length > 0)
ToAnalysis.parse(cols).recognition(filter(Array("NULL"))).toStringWithOutNature(" ")
str.toString
}
def tokenWord(df: DataFrame,parse:UserDefinedFunction,colName:String): DataFrame ={
val tokens = df.withColumn("tokens",parse(col(colName)))
.select(col(colName),col("tokens"))
var tokenizer = new Tokenizer().setInputCol("tokens").setOutputCol("tokens_array")
tokenizer.transform(tokens)
}
def tf_idffun(df: DataFrame) ={
var hashingTF =
new HashingTF().setInputCol("tokens_array").setOutputCol("rawFeatures").setNumFeatures(math.pow(2,18).toInt)
//这里将中文词语转换成INT型的Hashing算法,
// 类似于Bloomfilter,上面的setNumFeatures(100)表示将Hash分桶的数量设置为100个,
// 这个值默认为2的20次方,即1048576,
// 可以根据你的词语数量来调整,一般来说,这个值越大,
// 不同的词被计算为一个Hash值的概率就越小,
// 数据也更准确,但需要消耗更大的内存,和Bloomfilter是一个道理。
val hashtf= hashingTF.transform(df)
// hashtf.show(false)
var idf = new IDF().setInputCol("rawFeatures").setOutputCol("features")
var idfModel = idf.fit(hashtf)
var rescaledData = idfModel.transform(hashtf)
rescaledData
}
def filter(stopWords: Array[String]): StopRecognition = {
// add stop words
val filter = new StopRecognition
filter.insertStopNatures("w") // filter punctuation
filter.insertStopNatures("m") // filter m pattern
filter.insertStopNatures("null") // filter null
filter.insertStopNatures("<br />") // filter <br />
filter.insertStopRegexes("^[a-zA-Z]{1,}") //filter English alphabet
filter.insertStopRegexes("^[0-9]+") //filter number
filter.insertStopRegexes("[^a-zA-Z0-9\\u4e00-\\u9fa5]+")
filter.insertStopRegexes("\t")
for (x <- stopWords) {
filter.insertStopWords(x)
}
filter
}
}